


How I Built a Website With No Experience (Part 2)
Let's get into the technology...

Following on from my previous post, where I spoke about wanting to build a website and how I went about it, I will now go through some of the technology I used and the challenges I faced.
First things first, I knew I wanted to learn how to use Figma, a design tool in which you can create UX prototypes and design digital products. It is widely adopted across the tech industry and felt like a natural place to start whilst I hashed out what elements my website would need - a website, I had decided, that was to be a portfolio.
Wrapping my head around the interface, and how to create designs, was much simpler than I’d anticipated (though my design was so awful I will not subject anyone on the internet to that). The most useful tool I found, however, was the whiteboard functionality Figma has - or what they call, Figjam boards.
I’d initially done a bit of an info dump of what my website would need through the Medium of digital sticky notes, and alongside this had chaotically pasted some hex codes of colours I liked that I would use. This whole process took me less than ten minutes, but doing this small exercise proved invaluable down the line as I’d unwittingly created a brand palette of sorts:

I referred back to this Figjam board countless times during the development process; it would have taken me much longer to finish my site had I not done this!
Once I had a rough idea of how I wanted the site to look, I then fleshed out the actual technology this would sit on. After a bit of research, I settled on using Next.js for my website, a React framework that is high-performing, flexible, and good for lightweight applications. Another good reason to choose this framework - Vercel, the creators of Next.js, also created a platform where you can deploy your Next.js apps for free and whose interface is easy to navigate.
Starting with these building blocks, the following is the end tech stack I ended up using:
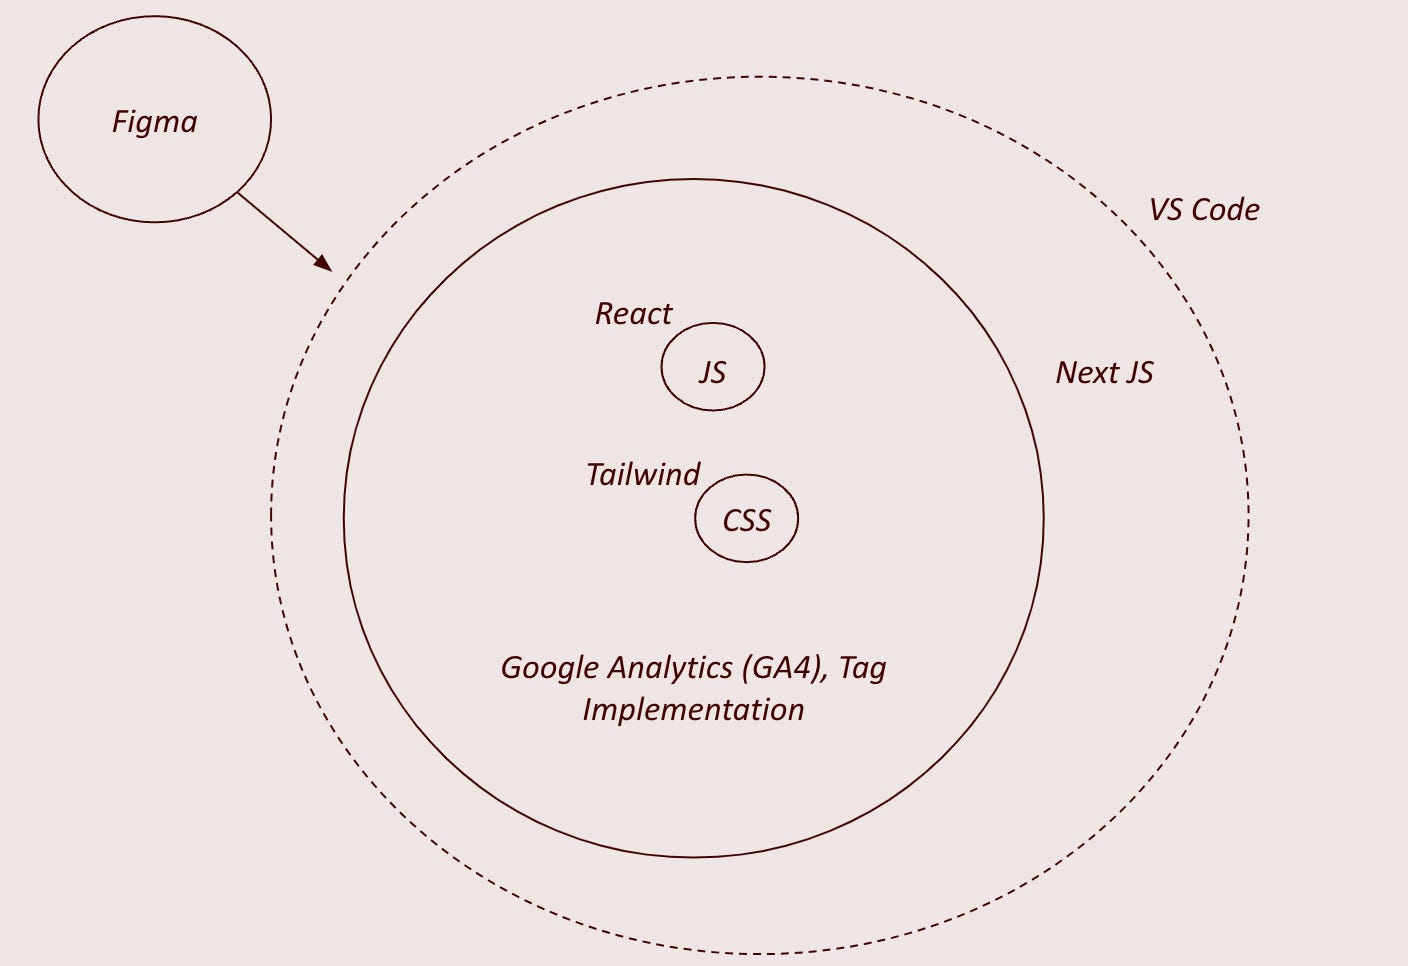
Using Tailwind CSS wasn’t a conscious decision on my part (the YouTube tutorial I followed happened to use it, and I happened to really like it), however it ended up making the process more enjoyable simply due to the fact I could edit how various elements looked on the fly and see it on the front-end straight away.
Ever the digital analyst, getting Google Analytics (GA4) set up was a must for me. The whole purpose of this project was to make me better at my day job after all. I found Next.js quite straightforward when adding the GA tag to my website code, and got my tracking up and running within minutes. Later on, whilst making improvements and optimisations to my site, I attempted to change my implementation, so rather than having the tag manually installed within my code I would use a tag manager - in this case, Google Tag Manager (GTM). This proved much more difficult, and after some digging I found out that GTM isn’t very compatible with Next.js (and, being honest, I still haven’t gotten this working yet!).
Challenges:
A couple of main challenges cropped up whilst I was building my website which I will talk to below:
Modal Overlays
One of the sections of my portfolio site is the Things I’ve Done section, where I walk through some relevant projects I’ve worked on. The tutorial I followed taught me how to create project cards, where I could add a header image, title, dates of projects, and a bit of a description of what I did.

I really liked the idea of this section, and wanted to add more details than the cursory couple of sentences that could be displayed on each card, so I decided to take things a step further as by this point I was quite comfortable coding in React.
The idea for having overlays that pop up when a user clicks on each card felt like a good solution. I was hesitant to link out to another page if a user wanted more info, as that would require building more pages, and my site thus far had been constructed with the intention of living on a single page.
But whilst the idea was nice, the work was not.
This was one of the more tricky things to create, and the functionality still isn’t perfect to this day. The combination of a lack of documentation for modal overlays in Next.js, as well as my relatively little experience in front-end, meant progress was stilted. I would make a breakthrough on one issue, only to encounter three more in its place, a modern day Hydra living within React to torment me.

After spending more time that I’d care to admit trying to get this working - a terribly fiddly process - I managed to get something working that was good enough. Sure, the X button might not always be visible, and the modal might glitch out sometimes, but it does what it needs to do.
I’ve been too scared to revisit this code since deploying my site lest I break it again. In fact, I doubt I’ll ever revisit it.
Email APIs
Something I did not expect to learn about (but am pleasantly surprised I did) was setting up an email API.
At the bottom of the page there is an email form for a user to reach out to me. It stupidly did not register when initially glancing through the tutorial that it would be me setting up the functionality to do this, and so, with three-quarters of a website working in my local environment, I put things on pause and set out to learn about APIs.
They’re something I was aware of in the same way I know how a dishwasher works - I could tell you what it did, and what the end goal was, but the ins-and-outs I had no idea about.

The tutorial took me through Postman, a service I hadn’t used before, and used Resend API for the emailing service - yet another tool owned by Next.js. Getting a test email to fire worked fine in my local environment, but getting it to work in production was a bit of a nightmare and took a good few attempts to get right.
Summary
In conclusion, getting my website up and running was not without its challenges, however the learnings were invaluable. Having an understanding of how some of these different aspects worked has definitely given me a level of empathy for what goes on behind the scenes for websites to function well, and certainly a level of empathy for some of the different roles I work with day to day.